Showing posts with label tutorial. Show all posts

Friday, September 10, 2021

Elune - Murky March Sunrise

 Elune color way Golden Yellow/Bright Orange/Celadon


Approx pattern thread needs 135 - will make up 140gms + 40gms extra celadon thread

This color way I wanted to make in the spring, based on a murky looking sunrise I caught in March this year that looked like a big yellow/orange egg yolk in a misty blue/green sky.


Dharma Celadon 157 Contains Turquoise

I tried and tried to get this color with my jacquard aquamarine by diluting it and mixing in some more blue and warm black, but they all came out too black or too green so I ditched it until I was able to order Celadon from Dharma. I did write them a note asking when it would be back in stock just looking for a possible eta, they said they did not have one as of yet but within a couple of weeks it was back to being available. I don't know if that was just for me lol but I will take it as a sign that Dharma is a great place to get dyes from. 

I decided to go with Jacquard Golden yellow and Bright Orange and  Dharma Celadon to try out a 3 color experiment instead of just mixing some golden yellow with bright orange as per the picture above. Elune is a big enough pattern that it will hopefully showcase the 3 colors nicely, but based on the wash out so far I may end up cutting out a bunch of that orange, its taking up a lot of space.

Based on some less than stellar experiences with 3 color pour on this spring I decided to try my hand on splitting up a skein into 2 smaller skeins to dye half of each color, 1st skein gets half dyed golden yellow and half dyed bright orange, 2nd skein gets dyed half orange and half celadon. Hopefully this will create longer color change ways as the colors are not so crowded, and its easier to estimate half a skein than 1/3 a skein.


3 color pour on, on one single ball left little room for color transition


I also decided I would test 2 different pour on methods to see the difference, the first is my most recent method of pouring the 1st color on, wrapping it up tight then loose and pouring on the 2nd color. The second method was to pour on the first color, let it batch then re-wrap it and do the 2nd color the next day, hoping that giving the 1st color more time to absorb and penetrate the ball would result in more color mixing when the 2nd color is poured on the next day. 

Previous dye job using 2 balls, one ball in golden yellow/carmine red and second ball in carmine red/navy allowing for lost of color transition room

Doing it this way also allowed me to see how the Celadon and orange would play together, being a blue/green color Celadon is not likely to play nice with orange and come out with some brown/muddy results. So by doing the 2nd method and dyeing the balls with yellow and orange first, if the Celadon/orange ball in the 1st method didn't pan out I could maybe mix up some Carmine red for the 2nd method instead for a nice yellow/orange/red colorway.


Method 1 initial rinse out Celadon/Orange

Method 1 initial rinse out orange and golden yellow

Rinsed and dried extra Celadon skein


I'm happy to say though that the Celadon/Orange mix has actually worked out pretty nice! There's some muddy look to the transition but its not too much, its also really worked well for the transition of colors I think it looks good.

Unfortunately I must not have been in my right mind when I started doing my 2nd method because I ended up doing it backwards. The way to do it is to wrap up half the ball tight and then wrap the other half up loose to get a nice even pour with the first color. Unfortunately what I did was wrapped it up loose 1st and poured on the 1st color, then wrapped up tight. This is making the 1st color start to penetrate quite far through the ball but hey I won't know how I feel about it till the final rinse and dry later this week, so stay tuned for that.

But the 1st method of pouring on one color on top of each other all at once seems to have worked out well, although as I said I may end up cutting out a large portion of the bright orange since that's quite a lot of orange. After running out of thread on a couple of patterns I decided to think ahead and dye up some extra thread in just Celadon in case I ran out at the end of the pattern, so I can make up from there I hope.

I would have liked to see more golden yellow but it seems to have mixed nicely with the slightly diluted orange, maybe next time I will stick with an orange/yellow mix entirely, that bright orange is reaallly bright. The Celadon actually ended up being too dark for what I wanted at first and I had to double my water to dilute it to what i hoped would be the color I wanted, which it was! 

In the past I estimated how much of the thread I would be dying in that color, so for this example I was dyeing a 70gm ball in golden yellow and orange, so I would make up 35ml dye stock for each color as that is half of 70gms. But I found that I was left with more streaking and white spots by being so exacting so this time I mixed up 70ml dye stock in each color for the full weight of the ball to try and use up as much as possible to really penetrate and soak in past the resist of the ball.

Dye amounts;

4* 70 gms skeins for 2 experiments, 2 balls per experiment to be divided up between colors, 1 ball yellow/orange and 1 ball orange/celadon. + 40gms extra skein of Celadon only just in case.

Golden Yellow, 2*70gm balls = 140gms = 140ml dyestock needed

140ml*5% DOS = 7gms [I went for 5gms because that's all I had left] = 1tsp

Bright Orange, 4*70gms balls = 280gms = 280ml dyestock needed

280*2% DOS [tried to reduce how bright it was, more or less lol] = 5.6gms = 1tsp

Celadon, 2 70gms balls plus 40gms extra = 180gms = 180ml

180ml*5%DOS = 9gms = 2tsp [however, when I opened the jar I saw how dark the dye looked and I wondered if 2tsp was too much so I started with 1tsp/5gms instead and boy was I glad I did because that was waaayyyy tooo dark for what I was going for. In the end I doubled the water on even that shade up to 360ml to dilute it, even knowing how colors often rinse and dry much lighter that's what I was going for]


Test color swatches on paper towels, golden yellow, orange and celadon after diluting


If ever you buy fiber reactive dye from Dharma, they have a handy tool on their site, a dye yield estimator, this can help you do more accurate dyestock estimates because it is taking into account their actual DOS as per their products vs how much dye powder is needed to achieve it. Note, this tool is for Vat dyeing or full immersion dyeing not painted or pour on dye like this method, that may be the reason the dye still came out darker than the color I wanted. I will have to test that theory out some other time to see the difference. In any case for now it seems that 5gms is what the calculator would recommend for dyeing 180gms fiber as well, but just the method may have tweaked the color result.

Dharma Procion Dye Estimator Calculator

A note on Dahrma dye, they look like very high quality dyes, not saying Jaqcaurd isn't, it's just that the dye particles look much finer vs jacquard, this may be due to the dye being fresher having not sat on an art supply shelf for a few years, still happy with the colors in either brand though.

The extra skein that I dyed up came out a bit darker than the color on the orange/Celadon skein, probably because I soaked that sucker in everything I had left of the dye to use it up lol, but darker at the end is better than lighter at the end, so far so good.


Now all I have to do is wait for the dry out and work it up to see how this looks!

The 2nd experiment had gone pear shaped from the beginning, see above, but I was actually happy with how it turned out and maybe learned a few things too, but again will have to wait and see the difference between how it works up on the doily itself.


Method 2 initial rinse out orange and yellow

Method 2 initial rinse out orange and Celadon


However I think in the future in this 2nd method I will start to tweak my pour on sequence, dark color first, lighter or brighter color second. Pouring on the celadon over top the of the orange really seemed to darken up the orange in this method, that may also be because I let it sit in the dye for a bit as well. Pouring the orange over the yellow didn't darken up the yellow too much but it did take up lots of room and came out very bright, again might be because I let it sit in the orange dye as well, must learn to be more consistent!

I just find that the second color that gets poured on in the 2nd split batch method ends up taking up more room, but mixes very nicely with the the color.  This is good though if I want to make a good estimate between the middle and ending color. So for example the orange yellow ball, the orange took up more room than the yellow, but in the Celadon and orange ball the Celadon took up more room allowing for more of its color to show which is good for that color as it will be at the end of the doily as the doily gets bigger and eats up more thread, this may present a more balanced looking color transition once worked up, but again will have to wait and see how it all works out.

But in my usual all at once method I may in the future have done the color combo a bit differently, the orange/yellow ball I would have poured the orange on first and the yellow on second, and for the orange/celadon ball I would do orange first and celadon second.


Again all this will have to wait till the doily is worked up to see how it all works out in the end.


Whoohoo! I am almost finished a doily with the method 1 pour on all at once thread and I am super happy with not only how the colors turned out but how well it has worked on the Elune pattern itself. I cut out about 12gms of the first ball at the end of the orange bit and continued on with the next ball, I had actually gotten all the way up to the round 49 where the edge is finished on the petals but I wanted to start those with the transition into Celadon color, so I cut out that bit of extra orange from ball 1 and that seems to have done the trick!

 Okay folks here she is!


Pattern Elune by Irina Maleeva


The second test balls came out with much more saturated colors, probably because I let them soak in the 2nd colors so I think I'm going to ball those up and keep the separated for another project, still happy with how both colors came out though!


Wednesday, April 21, 2021

Gradient Cotton Yarn/Thread Dyeing Tutorial – Painted Ball Method

Gradient Cotton Yarn/Thread Dyeing Tutorial – Painted Ball Method

Hi Everyone!

Now that I have given a basic breakdown of my past experiments with dyeing cotton yarn/thread into gradient colorways let’s move onto what everyone wants to see a full tutorial!

Today I am going to breakdown my most recent and favorite method of dyeing cotton yarn via the Painted Ball Method, wish I had a better name for it lol!

As noted in my previous post here this is a very time, space and water saving method – well in my eyes at least – and creates some lovely results!


Supplies

1.       ProcionMx Fiber reactive dye – see my previous posts about which dyes to buy or not. You can do this with just one color to create a single color Ombre effect or use multiple colors for a gradient effect.


2.       100% Cotton yarn or thread, you can also use any other cellulose fiber or mix of cellulose fibers such as a cotton linen mix, but anything acrylic or wool will not work.


3.       Soda Ash or Washing Soda or Sodium Carbonate this is the setting agent for the dye


4.       Synthrapol soap or dawn dish soap


5.       Urea – Optional, this is an agent that helps dissolve dyes when mixing and keeps moisture present in the batching process


6.       Rubber gloves, face mask & art smock or coveralls


7.       Measuring cups & spoons


8.       Mixing containers, can be plastic cups, containers or squeeze bottles whichever you have


9.       1 liter plastic bucket or container for pre-washing, soda ash soak and rinsing if you don’t want to use your sink


10.   Plastic drop cloth or newspapers for workspace covering


11.   Digital kitchen scale – this is optional but I use it to weigh my yarn to make the ingredient calculations, but if you know the weight of you yarn based on the label that can be used instead. I don’t use a scale to measure my dye and ingredients, just measuring cups and spoons, this is less accurate but I’m not a professional.

12.   Ziploc or seal able bag & saran wrap – saran wrap is optional but I find it keeps the dye run off tidy in the bag.


13.   Paper towels and cloth rags


14.   Tin roasting pan to work in


15.   Yarn swift and niddy noddy – these are optional but a big time saver see my supplies post


Step 1.

Calculations

First I need to do some simple calculations to ensure that I get the colors I want based mostly on the weight of my yarn.

Depth of Shade/DOS

Depth of Shade or DOS refers to how dark/saturated a color you wish to produce, for example a 5% DOS will produce a fairly dark/saturated version of the color, whereas a 1% DOS would be more pastel looking and a 3% DOS would be somewhere in the middle. Calculating DOS will then determine how much dye powder you will need to measure out. I usually work with 5% DOS to get a very saturated color that can then lighten as it penetrates the ball, but this up to taste.

Calculation;

Weight of Fiber/WOF x DOS = how many grams of dye powder to use

Ex. WOF = 100gms x DOS= 5% = 5gms dye powder or 100gms x .05 = 5gms dye powder


Dyestock Strength

Now that I have determined the DOS I want to use I will calculate my dyestock strength, this means figuring out how much mixing water to add to the dye powder to get the DOS I desire.

Calculation;

Gms of dye x ml of mixing water

Ex. Gms of dye = 5gms x mixing water = 100ml = 5% DOS dyestock

Ex 2. Gms of dye = 5gms x mixing water = 150ml = 3% DOS dyestock


Optional Dyestock Use Estimation

Next up in my calculations I will estimate how much yarn I want to be dyed with each color, so for example if I was doing 4 colors on a 100gm ball I will estimate that I want to dye about 10gms of the ball the first color, 20gms of the ball in 2nd color, 25gms of the ball in 3rd color and 45gms in the 4th color. I do this because the designs I work with are circular doilies that work out from the center and I want to create a full color change across the design. If I dyed each color the same amounts it would end up leaving not much color progression see below.


After I figure out these estimates it’s just a matter of converting gms to ml to determine how many ml of dyestock in that color that I will measure out to use. I try to mix up as small amount of dyestock as I can to cut down on waste, and often do more than one ball at a time so I can use up as much dye as possible.

So for the above project I would need color 1 = 10ml, 2 = 20ml, 3 = 25ml, 4 = 45ml. This is a very small amount of dyestock to mix up and would require a precise scale to measure out such a small amount of dye powder, which is why I recommend mixing up a solution in at least 100mls of water and subtracting the exact amount you need instead. Or you can just mix up 100mls of your dyestock solution and estimate how much you are going to use as you paint it on the ball.

Soda Ash Solution

Typically I will mix up a soda ash solution in a big 1 litre empty iced tea jug and keep it set aside for future projects, once mixed soda ash solution does not go bad. For soda ash I follow the dye manufactures recommendation of 100gms soda ash mixed with 1 litre/1000ml/4cups of warm water between 95-110F or 35-45C, this makes a soda ash solution at 10% strength. Give the bottle a good shake until powder is dissolved and set aside after labeling to cool to room temperature.

Urea water

Using urea in your dye mixing water is optional, it can make some dyes like fuchsia and other reds easier to dissolve and will keep your yarn wet during the batching/setting time resulting in more vibrant colors. Otherwise using plain old tap water to mix your dyes will suffice.

As per dye manufactures recommendation add 1 tablespoon of urea to 100ml warm water, or mix up 10 tablespoons in a 1 litre bottle if you are doing a big project. Since urea has to dissolve in warm water between 95-110F or 35-45C its best to mix the urea water separately like the soda ash and set it aside to cool down to room temperature so that it doesn’t affect the dyes when mixing.

Dyes should be mixed with water in temperatures between 75-95F or 25-35C to ensure that the heat does not cause the dye to react with the mixing water rather than the fiber, this can result in paler colors. The exception is turquoise which reacts slower and at temps around 110F or 45C, but will do fine with lower temperatures above.


Step 2. 

Prep and setup

Setup your workspace

First prepare and setup your workspace, I work in my kitchen so I make sure to clear off the counters and wash up all my regular dishes so that there’s nothing on the counters or in the sink when working with dyes and chemicals. Cover your surfaces with your plastic drop cloth or newspapers, I cover up my kitchen island counter where I do the majority of my work but not the floors, I have laminate floors and will just do a quick Swiffer mop after I’m done to clear up any drips or spills, to each their own.

Wash and soak yarn

To prep your yarn/thread will be dependent on if you want to wind your yarn into a ball off a skein or not, having a yarn swift to make a skein and wind off into a ball as you dye is really helpful but you could also make your skein by wrapping your yarn around the legs of two chairs. If that’s too labor intensive or you don’t want soda ash or dye possibly staining your furniture you can skip making a skein and proceed to scour and soak your yarn either in the ball it came in or wrap into a ball.

Once you have made your skein or ball of yarn soak and scour it in hot water and soap for about 20 minutes, wring out and move into the 1 liter plastic bucket. Fill the bucket up with pre-made soda ash solution until it covers your yarn. If your yarn is in a ball be sure to give the ball a good squeeze to get as much soda ash solution into the ball as possible. Let this soak for 20mins to an hour, during which time you can mix up your dyes. 

Mix dyestocks

Dyestock mixtures, while wearing gloves, face mask and some sort of covering on your clothes, set aside your measuring cups, urea water or mixing water, mixing cups, measuring spoons and mixing utensils into your tin roasting pan to catch your spills leaving less to clean up on your drop cloth. 

Here's my kitchen island all covered and set up to mix up my dyestocks, I kept them in the mason jars until I measure out the amount I want to use for each ball into a squeeze bottle.
 

When measuring out dye powder with your measuring spoons be sure that the spoons are clean of any other dye but also that they are completely dry to keep moisture out of your dye powder jars. Once in your mixing container, add a small amount of urea water at first and mix the dye into a paste before adding the rest of your water and mixing until all powder is dissolved. Set aside your mixed dyestocks in the containers you will be using, for me squeeze bottles.

In this example I am doing a 70gm ball of white thread with 3 colors as per my calculations above, I have mixed my 5gms of dye powder with 100mls of urea water in the following colors, Fuchsia, Peach and Emerald. I will use 10 ml of fuchsia, 25mls of peach and 35ml of emerald.


Step 3. 

Dyeing/Pouring/Painting

Now that all the dye is mixed up I will remove my mask and change my gloves or wash and dry them to ensure no stray dye is on them for when I handle the yarn.

Remove your yarn from the soda ash water and wring out until slightly damp, remember to wear gloves doing this because the soda ash can act as an irritant on your skin. You can pour left over soda ash solution back into your bottle, it may lose some of its strength but no use in wasting it. 


Place your skein onto your yarn swift or over 2 chair legs, or if using straight from the ball place in the now empty bucket to keep the ball in a clean place as you wind it in another ball while dying. Set out your dyestock colors and your clean tin roasting pan and a plastic bowl or container in the tin pan to catch run off dye.


3 colors used for this ball, fuchsia, peach and emerald

Begin winding your yarn into a tight ball for a bit, then begin to wind the ball more loosely say around 2-3 fingers for a while based on your estimates of how much you want to dye in color 1.

Wrapping the ball tight at the beginning will give a very pale penetration of the color 1 with a bit of white at the beginning.


Wrap the ball loose around a few fingers, this may result in a bit of tangling at then end but nothing too dramatic.


Over the plastic container or bowl in your tin roasting pan, start pouring your dye for color 1 over the ball until it is covered. Squeeze the ball and wring out this dye into the bowl, then roll the ball around in it and soak it back up. Do this a few times but be sure to soak up the remaining dyestock in the bowl or pour down the sink once you are done, it should not go back into the bottle with your left over dyestock as it has now come into contact with soda ash and it will spoil the remaining dyestock you have left over in the bottle.

Soaking up left over color in the bowl
Begin wrapping the yarn tightly around your dyed color 1 ball, until the color is no longer seeping through as much. Then start wrapping the ball more loosely around your fingers and repeat for each color.


Wrap tightly until you are seeing more white than color before wrapping loosely again


Ready for color 2 peach

At this point I will wash and dry my gloves to get as much of color 1 off my gloves before moving onto color 2, this should be done between each color.

Tight wrapping again

Your next emerald

And the final color Emerald

Once all dye colors have been applied wrap the ball up in a piece of saran wrap and place in to a ziplock or sealable plastic bag. Place this bag somewhere relatively warm to batch/set for the next 12-24 hours.

Saran wrap keeps excess dye from running out into the bag

All bagged up and ready for batching


Now all that’s left for the day is to clean up your workspace, so easy!


Step 4. 

Rinsing & Drying

After batching/setting overnight take the ball out of the bag, I usually rinse and dry these bags to reuse to cut down on waste but throw away the saran wrap.


Give the ball a quick rinse in cool water in the sink, squeeze out and put in plastic bucket to contain the ball as you unwind it into a skein.

Quick Rinse in cool water before winding into a skein

 At this point unwinding the ball into a skein is essential to be able to properly rinse out the soda ash, excess dye and dry out, you will not be able to allow the ball to dry in ball form and then use, never done it but I can’t imagine that working out well.

However you need to do it, either with a yarn swift or niddy noddy or around some chair legs, be sure to wear a long sleeved shirt and rubber gloves to catch any soda ash or water that come off as you unwind the ball so it doesn’t get on your skin and cause irritation or staining. Tie up your skein to keep from tangling and take back to the sink for rinsing.

Ball in bucket to keep it clean while winding into a skein, I like putting paper towels in there to soak up extra water

Tie onto the niddy noddy, bad me not taking my own advice on gloves and long sleeve shirts, I did put them on eventually I swear!

A little tangle that I will fix up during this time, excuse my toe lol!

But it is just so fun to see the color transitions work out as I wind them onto the niddy noddy
 

Ain't she a beauty? Future Indunn doily

All tied up and ready for rinsing, note colors will be darker before the rinse out and dry

Run the skein under cool/cold water to wash out the remaining soda ash, rinsing this out ensures that any unfixed dye left in the skein will not set where it spreads when you soak it in hot water causing color bleeding. 


Initial cold rinse under the tap to get soda ash out.

Fill up your sink, wash basin or bucket with the hottest water your tap will provide, add a small drop or two of synthrapol soap or regular dish soap, then put the skein in to soak for an hour or until the water cools. If after the hot soap soak you still find color running out of your skein do another hot soap soak until it runs clear or clearer.

Only need a small amount of soap in hot soak.

Splish Splash I'm having a bath!
 

Wring the skein out and hang up or lay out somewhere to dry, usually takes 24-48 hours to be dry before you can wind back into a ball for use.

And there they all are hanging up to dry over the bathtub on coat hangers, will be 24 hours min to dry
 

Below are the pre-dry results of my biggest dye day yet, I dyed 8 balls of thread in about 8 hours, if I had mixed up my dyestock the night before it might have taken less time. Or better yet if I had more measuring spoons and squeeze bottles there would have been less washing between colors. 

Winding and pouring on dye for each ball really only takes about 20-30 minutes depending on how big the ball and how many colors used. Then I just left them all to sleep in their little ziplock cocoons before they emerged the next day on my niddy noddy for winding & rinsing day.

Future Teagan doily, in aquamarine, turquoise, fuchsia and lilac

Future Camilla doily in peach, lilac and turquoise

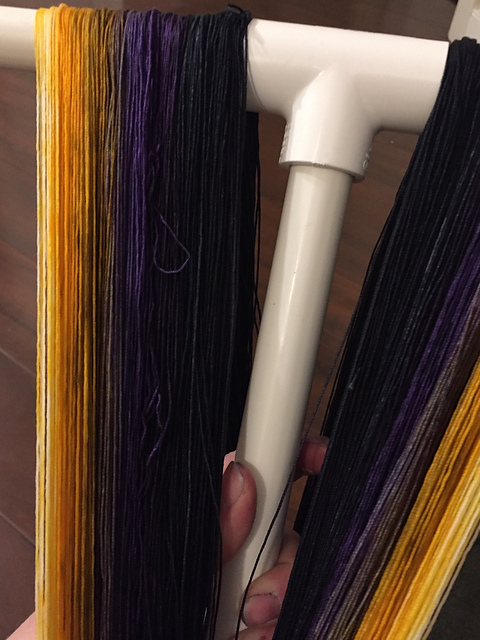
Future Fairie doily in golden yellow, lilac and warm black

Future Amal doily in bright green, emerald and teal

Future Irida doily in lilac and teal

Future Birgitta doily in peach, golden yellow, aquamarine and teal

Future Emma doily in golden yellow, fuchsia, aquamarine and teal


And that’s it! That is my newest and favorite method of dyeing gradients for cotton thread, thanks for reading, I hope you find it useful in your dye adventure!


Move Out Dye Job Follow Up

 Move Out Dye Job Follow Up   Here is the follow up on my move out dye jobs now that I have had time to get them all worked up into a few pa...